Over the summer I was inspired by this blog:
playathomemom3.blogspot.com
...because they do a LOT of awesome things on their light tables. A light table or light panel is simply a glowing surface. In the classroom, it can be used for sensory play, or translucent toys, letters, x-rays, etc. It adds a whole new dimension to play. It sparks curiosity and questions. It's exactly the kind of thing we love in our kindergarten.
At first I told myself, "That's neat, but I don't have one." After all, most public school teachers aren't exactly issued a light table. The more I saw though, the more intrigued I became. After reading up on some DIY light table projects, I got to thinking that with the help of my Dad, surely I could make my own. My initial thought was an old drawer. The benefit of a light panel made out of a drawer would be its mobility. You could use it on the floor or on a table. You could move it to any center in the room. This was certainly a good idea.
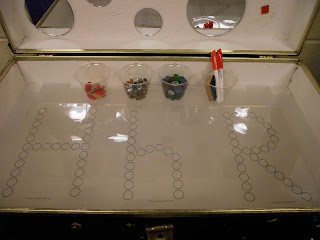
In the end though, I chose an old trunk. The benefit of it would be: more playing surface. The trunk had been sitting in my bedroom for several months. I had planned to take it to put dress-up clothes in at school. Instead, it became the object of one of my favorite projects I have ever done. And, here... are the results.
These pictures were taken the day I made the light table. 
I took my trunk into Lowe's with me. They cut plexi-glass to fit perfectly inside the trunk. That was the expensive part of the project- about $50. I did have some leftover glass after they cut it, and I used that on my play kitchen project. Rebekah made her light trunk after mine and she managed to find the plexi-glass at a local place for only around $25. (JEALOUS!) I also bought shower door frost spray paint for clouding the glass and diffusing the light. We used wood scraps to build a ledge on the inside for the glass to sit on, and we put two florescent tube lights on the inside. (Drilled a hole in the back for the cords to run out of.) Also, simply for aesthetic value, I painted the inside lid white. The small round mirrors were the only thing I didn't get at Lowe's- they came from
Hobby Lobby.

After my dad and I finished the table, my mom and I were itching to try it out. We gathered everything we could find that was translucent, and filled two Ziploc bags with dish soap. (All of my neat materials were at school!)
To get the FULL affect, we invited the three year neighbor over to try it out. She was timid at first, but her eleven year old brother LOVED it. He sorted the rocks by color on the matching squishy bags.
I didn't pressure her to play, but she was finally won over.
Her favorite part was mixing colored water on the light.


